Baking: Red Velvet Cupcakes: The Return of the Frosting

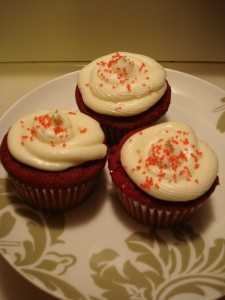
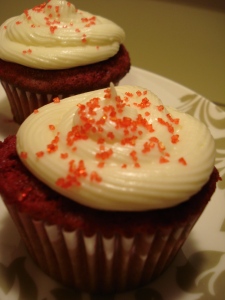
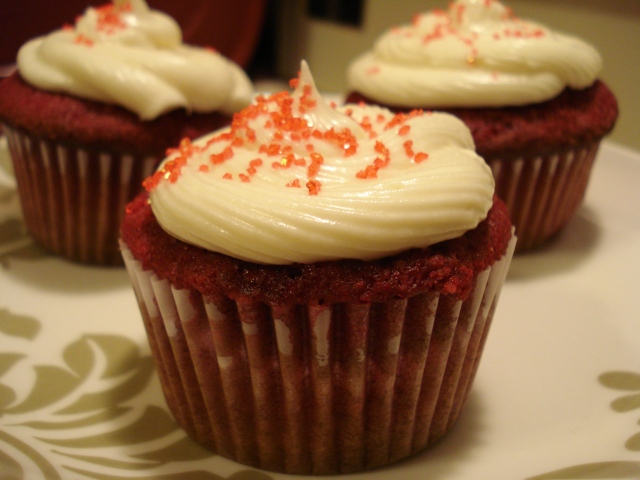
The cupcakes turned out very well. They weren’t as red as I’d like them to be (probably needed more colouring), but they have a nice, sweet flavour. The perfect topping could only be cream cheese frosting. Here’s the recipe that came with the cupcakes.

16 ounces of cream cheese, room temperature

1/2 cup of butter, room temperature

1 teaspoon vanilla

2 1/2 cups powdered sugar

pinch of salt

Blend the cream cheese and butter until smooth. Turn to low speed, add vanilla, sugar and salt. Beat on high until light and fluffy. You can add more sugar if you want (up to 4 cups), but I found 2 1/2 cups to be the perfect balance between sweet and tart.

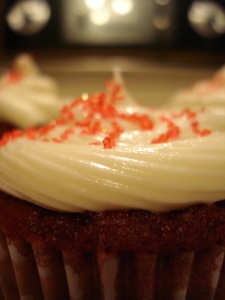
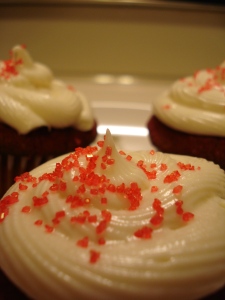
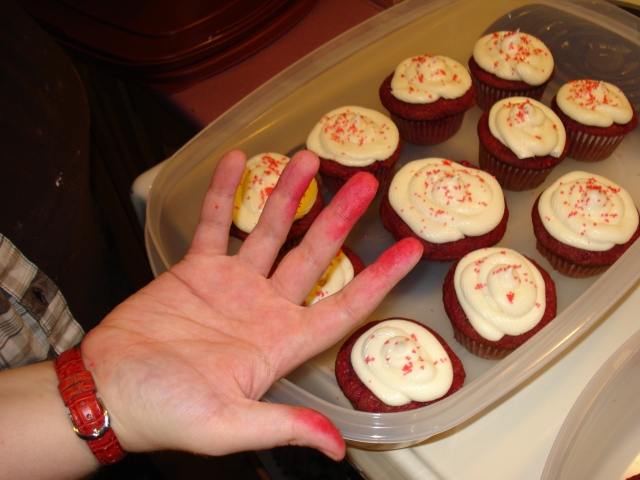
I piped the frosting on (still a bit messy, but I am getting better…) and sprinkled it with red sparkle sugar. Voila! Red Velvet Cupcakes! And it only took 3 posts!

Oh, and the sparkle sugar, as well as the cake batter, does turn your fingers a lovely shade of fuchsia. My hair was this colour once…

Posted in Recipes | Tagged , , , , , , | 1 Comment

Baking: Red Velvet Cupcakes: The Two Food Colours

I believe that my first batch of Red Velvets were bitter from the food colouring I used. I used gel food colouring, which is more intense and potent than liquid food colouring. While this helps give a beautiful crimson shade to the cupcakes, it also has a tendency to make things taste quite bitter. This is why my second batch, recipe linked referred by Kara at Butter Hearts Sugar (check it out, awesome blog!!!) worked out much better than Martha’s. The recipe called for quite a bit of liquid food colouring, but it didn’t have that bitter, slightly metallic flavour of the last batch. Here’s the recipe:

2 1/2 cups sifted cake flour (not self-rising)

1 teaspoon baking powder

1 teaspoon salt

2 tablespoons cocoa powder

2 ounces of red liquid food colouring (2 bottles! Wow!)

1/2 cup unsalted butter, room temperature

1 1/2 cups sugar

2 eggs, room temperature

1 teaspoon vanilla extract

1 cup buttermilk, room temperature

1 teaspoon baking soda

1 teaspoon white vinegar

1. Preheat the oven to 350 F. Sift flour, baking powder and salt together into a bowl.

2. Mix the cocoa powder and food colouring into a smooth paste. Make sure you work out the lumps.

3. Cream butter and sugar until light and fluffy. Add the eggs, one at a time until incorporated. Beat in vanilla and red cocoa mixture. Scrape down the sides to ensure the red is distributed evenly.

4. Alternate the flour and buttermilk, adding the dry ingredients by thirds, the butter milk by half (dry, wet, dry, wet, dry). Combine vinegar and baking soda in a small bowl (this will fizz. Reliving grade school volcano science experiment is optional.) and add to batter, stirring to combine well. Scrape down the sides of the bowl by hand to ensure everything is combined.

5. Divide batter evenly amongst cupcake liners (obviously in a cupcake pan). Bake for 20-22 minutes or until a toothpick comes out clean. Make sure you don’t overcook these. Allow to cool in the pan for about 10 minutes before transferring cupcakes to a cooling rack. Allow to cool completely before frosting.

I left these at room temperature in an air-tight, covered container.

These were much better. All yum, no yech. This is how all baked goods should be. Oh, and I actually found buttermilk at the grocery store! No need to use the good ole milk and vinegar trick this time! It works just fine, but it is nice to actually get the buttermilk.

These were nice and sweet, slightly chocolate-y with the vanilla flavour. None of the ass flavour of the previous cupcakes. To celebrate, here is a picture of happy cat.

Posted in Recipes | Tagged , , , , , | 3 Comments

Label-Making Fun!

I bought a label-maker. My dad had one and after the novelty of writing “jerk-face” labels wore off, I saw that this could be quite useful. Specifically in my kitchen. So when I went to Costco with my mother today, I saw one for sale. This is the one I bought:

I’ve decided to name it Roberto, seeing as it has an n with a tilde on it (next to the z). Roberto is awesome. He has since labelled all of my flour, sugar and miscellaneous canisters in the kitchen. He has also labelled all of my spice jars, as well. Next, I labelled the bins in my front hall (can’t remember which bin has the umbrellas without pulling the bin down). Then onto the linen closet.

Roberto is my new favourite toy. The only beef I had was that he did not come with batteries. Le sigh. He came with white plastic, white paper and clear plastic labels. That way I can use different types of labels for different uses. I chose to use the clear plastic labels on all of my canisters and in the kitchen. In the linen closet and front hall, I used white plastic. So cute. So organized.

I may have gone overboard when I started to label the hangers in the closet…

Posted in Cleaning/Organizing | Tagged , , | Leave a comment

Autumn Vegetables: Carrots

This is the perfect time of year for carrots. I find they taste a little sweeter after there is a chill in the air. I try to get them with the greens attached, but remove them as soon as you get home. The pretty, leafy tops tend to leach the sweetness out of the carrots. Keep them in a dry, cool, dark place and they will keep for a long time.

Carrots are really, really good for you. They are full of beta-carotene, which your body converts to vitamin A. Vitamin A is great for lung health. As well, they are full of carotenoids, which are thought to prevent cancer and have been linked to blood sugar stabilization. They are also high in fibre and vitamins K and C.

Carrots are great in salads. You can shred them, but I like to shave them into ribbons with a vegetable peeler. They are great with a lime vinaigrette with a little pinch of cumin and a sprinkle of green onions and coriander. You can also use them in soups, especially carrot and ginger soup. This is great for those cool fall days when there’s a chill in the air. Carrots are also delicious roasted. Just cut into coins on the bias (this gives a larger surface area), toss with olive oil, salt, pepper, whole garlic cloves and a little rosemary (fresh or dried). Scatter them onto a baking sheet in a single layer and roast until tender and brown around the edges. This is an easy, delicious side. They also make a perfect roasting rack for under a roast chicken. Just peel them (or scrub them to keep more nutrients) and place them under a chicken to keep the meat out of the juices. The skin will get crisp that way and the carrots will roast and soak up all of the beautiful chicken juices.

Carrots are great for snacking. They’re crisp and sweet, a perfect vehicle for scratch-made dips and hummus. They’re usually pretty easy to get kids to eat. Baby carrots are actually just large carrots that are shaved into their little, nubbly shapes. Personally, I find baby carrots can get a little woody, so I prefer to just cut the carrots into smaller sticks for dipping. They travel well, too, so they make a great addition to a lunch box.

Eat some carrots! They’re not just for rabbits (or hamsters…)!

Posted in Recipes | Tagged , , , , | 1 Comment

Baking: Red Velvet Cupcakes: Fellowship of the Cake

I’ve never had Red Velvet Cupcakes before, but they seem to be all over the place in the last 3 years or so. First, I wanted to read up on them. Apparently, the cake’s colour originally came from the buttermilk and vinegar developing the anthrocyanins in the cocoa, which gives it a red hue. Anthrocyanins are pigments found in foods that are coloured red and blue, like berries. They are currently thought to prevent cancer, heart disease and a whole slew of other illnesses. That being said, eating these cupcakes probably won’t have any beneficial effect on one’s health. In fact, if you eat the entire batch, they will probably have a detrimental effect. But I’m no doctor…

Anyway, being the nerd that I am, I continued to read up on Red Velvet cake and read that during WW2, beets were used to give the cakes their red colour due to food rationing. Some old recipes have grated beets or puree in them, which also helps keep the cake moist. Thank you, Wikipedia. Anyway, I figured I might as well give these a whirl.

I first tried a recipe from Martha, as usual, but was surprisingly disappointed with the results. This is what I get for mucking around with her Boston Cream Cupcakes. Other than bitter around the edges, they didn’t seem to have much flavour at all. As well, all of the centres in the cupcakes were all sunken in. I had to throw these out. What a waste of red colouring gel and Hello Kitty! cupcake liners… Back to the drawing board.

I’ve also had a peek at How to Eat a Cupcake’s recipe for Red Velvet cupcakes. I don’t have any shortening on had, and now I’m all out of red gel (I’m actually probably going to try a bottle of food colouring), so I’ll have to try these later this week.

Stay tuned for some cupcakes. Same cuppy time, same cuppy blog.

Posted in Recipes | Tagged , , , | 4 Comments

Make your own Glass Cleaner

I hate cleaning windows. I don’t really do it that often. I mostly clean the mirrors in the bathroom. I actually go through quite a bit of glass cleaner, so I found a recipe for a cheaper version. This is all you need:

1 cup rubbing alcohol

1 cup water

1 tablespoon vinegar

Mix and put into a spray bottle. You might want to start labelling all of these bottles… You can also use this to shine chrome and stainless steel. Honestly, I don’t really find it a big deal if my kitchen sink isn’t spotless, but I digress.

Since I’ve made so many cleaners, the only thing dirty in the house should be a dirty Martini. Here’s a recipe:

2 ounces gin

1 tablespoon dry vermouth

2 tablespoons olive juice

ice

2-4 olives

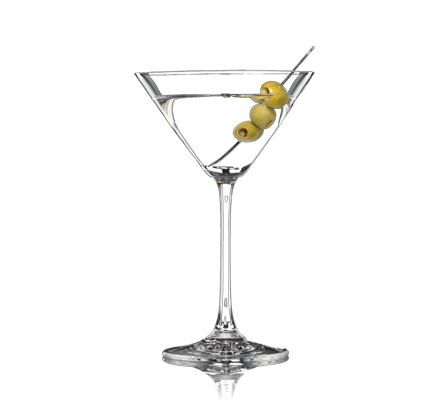
First, get the glass really cold. I like to throw it in the freezer for about 15 minutes or so. Next, add all ingredients except for the olives into a shaker. Shake until freezing cold, pour into the chilled Martini glass and plop in the olives. Enjoy!

Since your glass will be shiny and clean, you may want to draw the blinds so the neighbours don’t see you drinking Martinis at 10:30am while watching the Price is Right. Especially if you’ve had a few and you get excited when they spin the wheel. So excited that you start miming spinning the wheel yourself. And you spin the fake wheel so hard that you fall down. Yeah, no one else needs to see that. If you want to watch people fall down as they spin the wheel, search “wheelies” and “Price is Right” on Youtube.

Posted in Cleaning Tips and Tipples, Cleaning/Organizing, Recipes | Tagged , , , , | 3 Comments

Baking: Boston Cream Cupcakes: 2 Creamy, 2 Chocolatey

Now that the cupcakes are done and the vanilla cream is done, all that is left to assemble is the chocolate ganache.

2/3 cup heavy cream

6 ounces semi-sweet chocolate

1 tablespoon corn syrup

1. Bring the cream to a boil.

2. Pour over chocolate and corn syrup and let it sit for about 5 minutes. Whisk until smooth.

3. Let cool, stirring frequently. Use immediately.

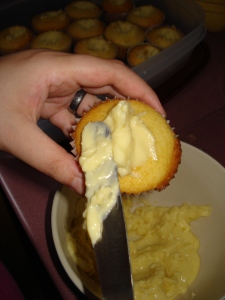
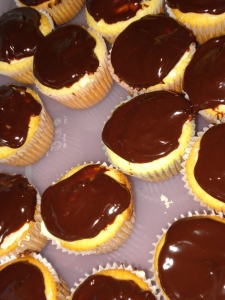
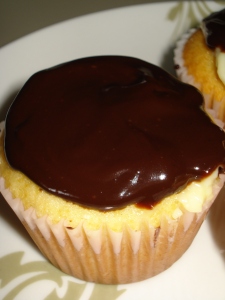
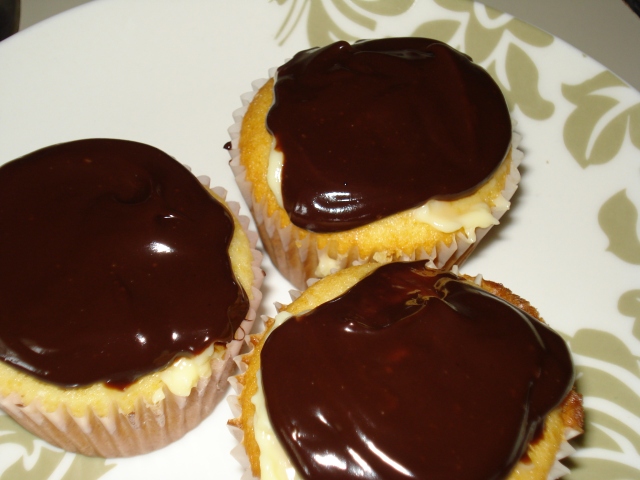
That’s it. Again, pretty simple. Now I’m going to assemble the cupcakes in a completely different manner than Martha does. This feels slightly wrong, but it looked a little messy to eat and I wanted to use cupcake liners, so I’m not slicing them in half. Instead, I scooped out a little cake from the top of the cupcake. I filled the indentation with the vanilla cream until it was flush with the top. Then I spooned the chocolate ganache over the top. Beautiful.

These were really yummy. The cupcakes were moist, the vanilla cream was smooth, creamy and sweet and the chocolate was nice and rich. These are a winner. And I got to snack on the little nubs that I scooped out. Bonus.

Posted in Recipes | Tagged , , , , , , | 5 Comments

Baking: Boston Cream Cupcakes: The Beginning

So I’ve decided on Boston Cream Cupcakes as my next baking project. Much like the Lemon Meringue Cupcakes, these are a multi-stepped cuppy cake. And who doesn’t love Boston Cream Pie? It’s cake, cream and chocolate. Anyway, instead of doing it all in one shot, I’m going to make the filling first. Here is the recipe for Martha’s Vanilla Cream (essentially, vanilla pudding):

2 large egg yolks

1/4 cup sugar

2 tablespoons + 1 teaspoon of cornstarch

Pinch of salt

1 cup whole milk

1/2 teaspoon vanilla extract

1. Combine sugar, cornstarch and salt in a saucepan. I don’t really know why, but I guess it’s to avoid excess dishes to clean when done? Anyway, while whisking, slowly stream in the milk. Cook while whisking until it thickens, about 5 minutes or so.

2. Now you have to temper the eggs. Whisk the egg yolks until they are very smooth. While whisking, slowly add about 1/3 of the hot milk mixture into yolks in a slow stream. If you add it in one big dump, you’re going to end up with sweet scrambled eggs. Yech.

3. Add the eggs to the remaining milk mixture and cook gently over medium heat. Stir this constantly. There’s a lot of stirring involved, but this does help prevent the bingo wings that develop from eating so many cupcakes, so suck it up, Princess! Stir until it is thick, about another 2-3 minutes, then remove from the heat and add the vanilla. This did not take long as it was pretty thick from the beginning. It’s just like pudding. Strain it through a sieve and cover with plastic wrap. Push the wrap directly onto the surface of the cream, so you don’t end up with an icky skin on the top. Refrigerate for at least 1 hour or up to 2 days.

Next I made the cupcakes. They were really easy. Here’s the recipe:

6 tablespoons butter

1/2 cup milk

3 large eggs

1 cup sugar

1 1/2 cups flour

1 1/2 teaspoons baking powder

1/2 teaspoon salt

1 teaspoon vanilla extract

1. Martha says to butter and flour the tins, but I’m making mine a little differently, so I just used cupcake liners. I was going to use my new Spongebob Squarepants liners, but I’m going to save them for future cupcakes (maybe rainbow cupcakes…). Preheat your oven to 350F.

2. Martha also says to heat the milk and butter in a saucepan, but I just microwaved it. I put it in for 30 seconds, then stirred it and zapped it for another 30 seconds or so. The milk should be hot (but not curdled. That’s too hot.).

3. Add the eggs and sugar to your stand mixer and beat on high until it is light yellow and thick (about 5 minutes or so). Add the dry ingredients and beat until smooth (not too much or you’ll get bread again). Then add the hot milk and butter. Add the vanilla.

4. Divide amongst the cupcake liners. I got about 18 cupcakes out of this mix. I also got to use my new favourite tool: the ice cream scoop. I know, I know, everyone knows by now to use an ice cream scoop to evenly dole out batter, but I kept forgetting to buy one. Last time I was at my local kitchen supply store, I got one (as well as a bitchin’ cooling rack. LOVE.) and it was freakin’ (my mother reads this blog) awesome. It was way easier and cleaner and I loved the little scoop-y noise it made.
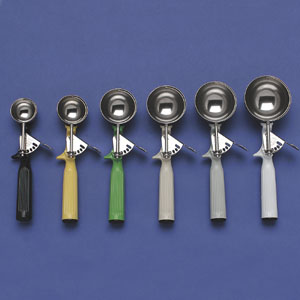
Anyway, enough of the ice cream scoop love. Bake the little suckers for about 15 minutes, or until lightly brown and a toothpick comes out clean. Let them cool completely before assembling.

That’s all I did tonight. I read the comments on Martha’s site and some had mentioned that they get gummy if you add the vanilla cream a day ahead, so I’ll make the ganache and assemble them tomorrow. Two posts from one cupcake. Awesome.

Posted in Recipes | Tagged , , , , , , | 2 Comments

Autumn Vegetables: Beets

OK, OK, it’s technically not autumn yet (today being Labour Day and all), but I’m in an autumn mood. It has cooled down a little here and I’ve been craving heartier, stodgier dishes. Soup, stews and braises are on my mind. I’m going to do an entire post devoted to pot roast soon (probably the next week or so). But for now, I’d like to talk about beets.

I’ve always loved beets. When I was a toddler, my parents would go to Burger King when they used to have a huge salad bar (this probably ages me a little…). I would happily eat a supper of french fries and pickled beets and I’ve loved them ever since. They’re really, really good for you, too. They’re high in folate, potassium and manganese. And their bright fuchsia hue that stains the entire kitchen isn’t just pretty, it is full of betacyanin, which is a very powerful anti-cancer agent. And they’re delicious.

Beets are sweet and earthy. They are a wonderful root vegetable. I like to use them in salads. My favourite is to use roasted beets with spinach, red onions, goat cheese and pine nuts with a balsamic-maple vinaigrette. Dress the beets separately from the rest of the salad or the entire bowl will be pink. They also pair well with citrus fruits for salads, both with the dressing and slices of the fruit. Beets are also great in soups, like borscht. I like to make a pot of carrot, beet and ginger soup for lunches at work. Just add roasted carrots, beets and onions to a pot, add some stock, garlic and lots of the aforementioned ginger. Puree when all is tender and season liberally with salt and pepper. I also like to add a splash of rice wine vinegar to perk up the flavours at the end.

Beets are also a great simple side dish. They are especially sweet when roasted. This is also the easiest, less-messy way of preparing them. Remove the stems and tails and wrap in a few layers of tin foil. I like to add a sprinkle of salt and a glug of olive oil before wrapping it up completely. Roast it in the oven for about 45 minutes or so at 350F, or until tender. Let them cool slightly until you can handle them. The skins slip right off. I usually put a plastic bag over my hand so I don’t have pink fingers for the rest of the day. Chop them and serve immediately. They’re really good with a little more olive oil and a splash of balsamic vinegar. Sweet and tangy.

Beets are definitely best fresh, but if you can find some good pickled beets, they’re also great as a side for sandwiches or in salads. Whatever you do, do NOT buy canned beets. They’re almost a dull red as opposed to the vibrant pink and taste like wallpaper paste. I do not need to get into how I know what wallpaper paste tastes like. Just trust me on this one.

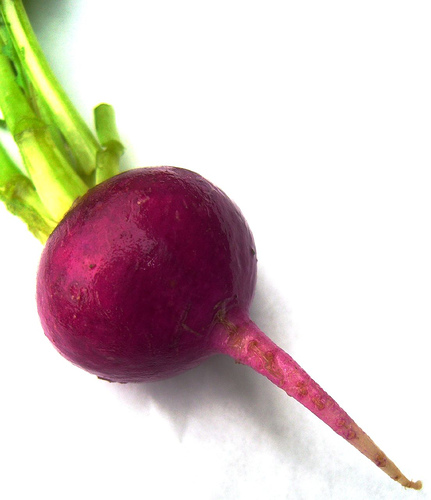
Eat some beets! They’re good for you and they taste great! Look how purdy!

Posted in Recipes | Tagged , , , , , | 2 Comments

Breakfast in Bed

There is nothing nicer that getting breakfast in bed. When I was four, I tried to make my Mom tuna salad for breakfast in bed (I was a strange little kid). My hands were too weak (and probably not very clean), so I couldn’t squeeze out all of the water from the tin. And I put it on lettuce that was wilted by the time I got it on the tray and upstairs. Poor Mom had to choke it down and pretend it was delicious. Ahh, the memories.

Anyway, who doesn’t love breakfast in bed? Well, the crumbs aren’t that great, but you can deal with that later. The thing I like to remember about breakfast in bed is that it’s best if you don’t bring too many things that require a fork and knife. A fork, yes, but skip the knife. It’s kind of awkward and you might end up with the bacon being splattered on the wall. Bacon grease is not a part of any boudoir decor that I know of. I like to serve muffins, croissants, assorted pastries, fruit salad (no one wants to peel an orange in bed) and eggs and toast. You can also do french toast or pancakes, but I’d skip the waffles due to the aforementioned knife rule.

As well, since you’re making the effort, I like to serve a Mimosa (orange juice and champagne) or, my favourite, a Bellini. A Bellini is a mixture of sparkling wine, like Prosecco, and peach puree. It’s delicious and really makes the occasion seem special. As well, use cloth napkins and a cloth place mat on the tray. If you put a flower in a bud vase, you’re definitely getting some brownie points.

The tray is very important. After breakfast is done, you want to be able to clear the dishes away quickly so you can enjoy your reward, if you know what I mean. What? You’re already in bed!

Serve your sweetie breakfast in bed this weekend! Just skip the tuna salad…

Posted in Recipes | Tagged , , , , , | 4 Comments